3
3. ComposiMold as poured, with room left around the
master to produce a stable mold.
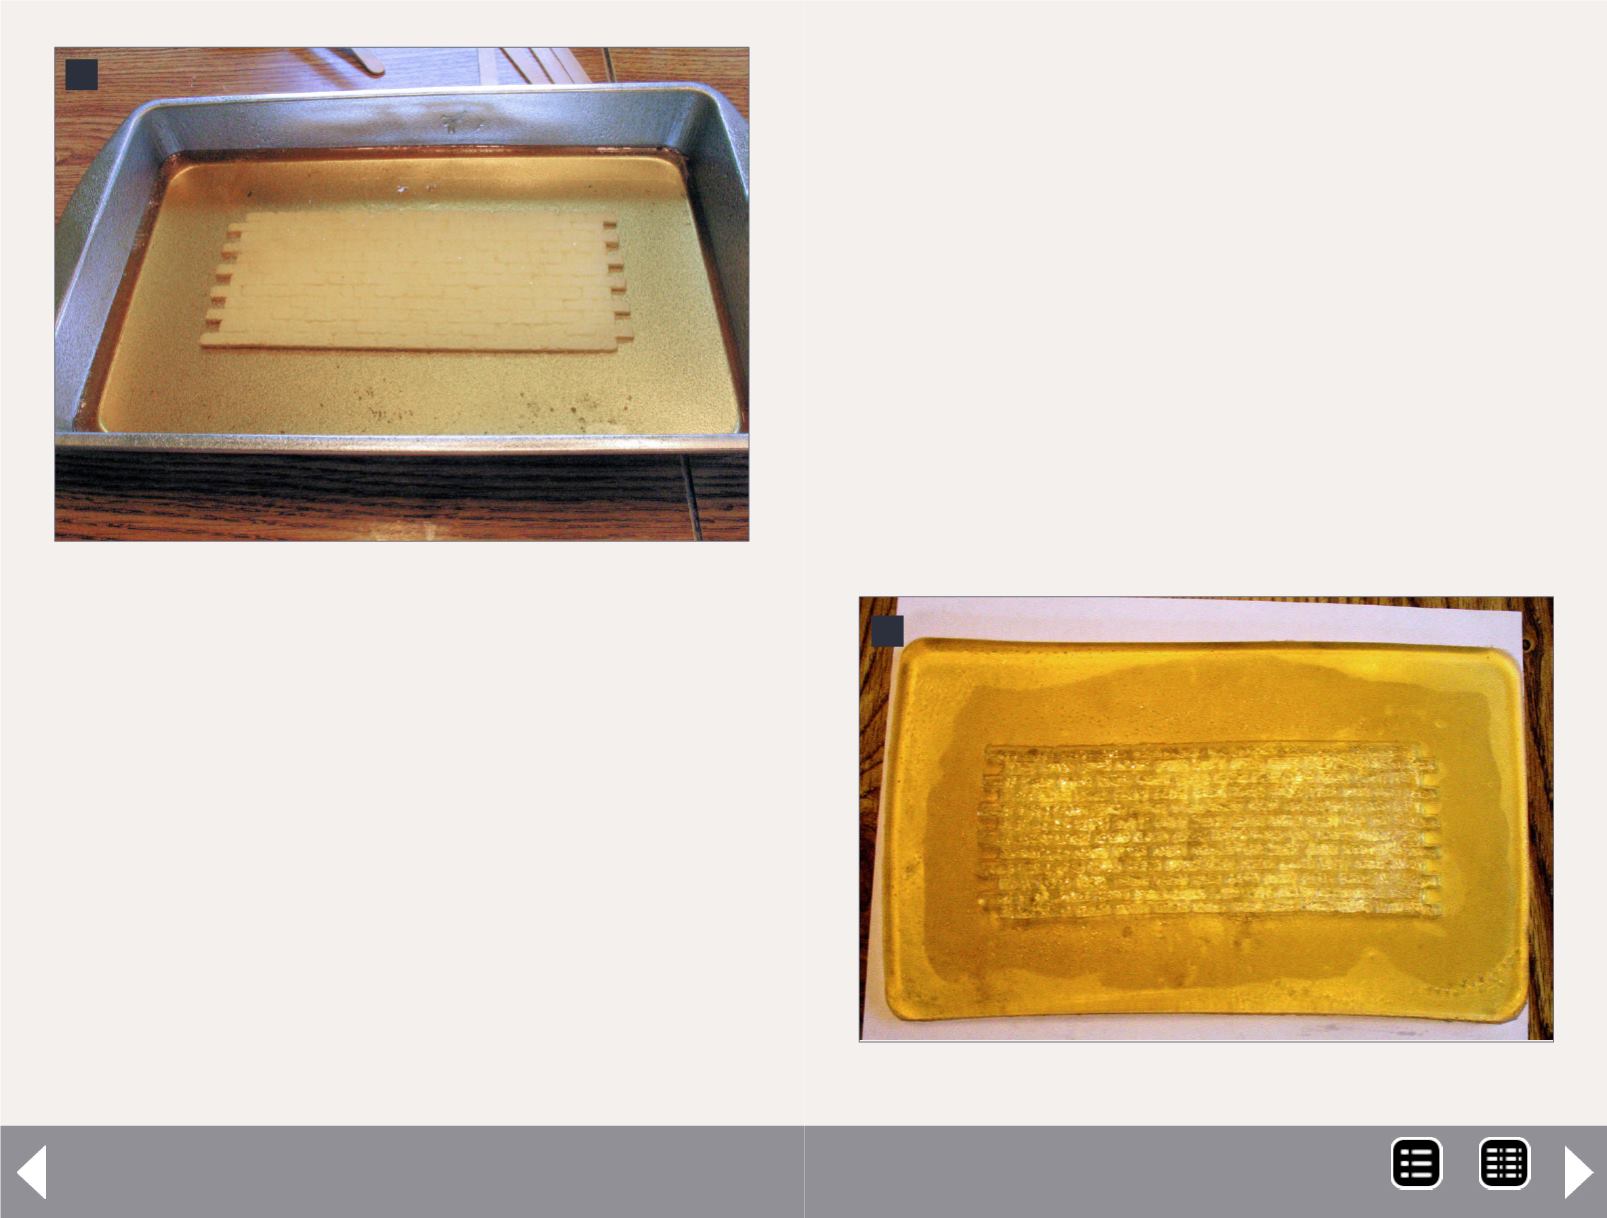
Pour the mold
The jar will be hot. Hold it with oven mitts and pour the
ComposiMold into a corner of the mold box – not directly onto
the master – and let the rising level of the liquid cover the mas-
ter. You should cover the master by at least 3/8” on all sides
and the top; ½” or more would be better (3). If your master
floats away, deal with that first. Remember, if you can't get
the master settled down, all is not lost. You can let the mess
cool, peel off the ComposiMold, re-affix the master, remelt the
ComposiMold and try again.
Use a toothpick to dislodge any bubbles clinging to the surface
of the master. If you don't, you'll have blemishes in your mold
but, of course, you can always try again! ComposiMold's trans-
parency allows you to see the surface of the master to prick
and coax the bubbles away from the master's surface.
Once the master is free of bubbles, all you have to do is to wait
for the mold to cool – not just solidify. A solidified mold may
still be soft on the inside and may tear or distort as it is pulled
away from the master. Cooling can be accelerated by placing
the mold in the refrigerator or freezer; just remember to keep
it level, and let your spouse in on what you're doing. The mold
produced by ComposiMold (4) is shown on top of a sheet of
white paper to enhance contrast.
The mold will be somewhat soft compared to silicone rubber
molds. This is normal. The mold is sprayed with mold release
before filling the mold with plaster (5). The mold is peeled
away to reveal the completed casting (6).
4
4. The wall section mold produced by ComposiMold.
Easiest way to make molds - 4
MRH-Jan 2014


