Radio base station - 4
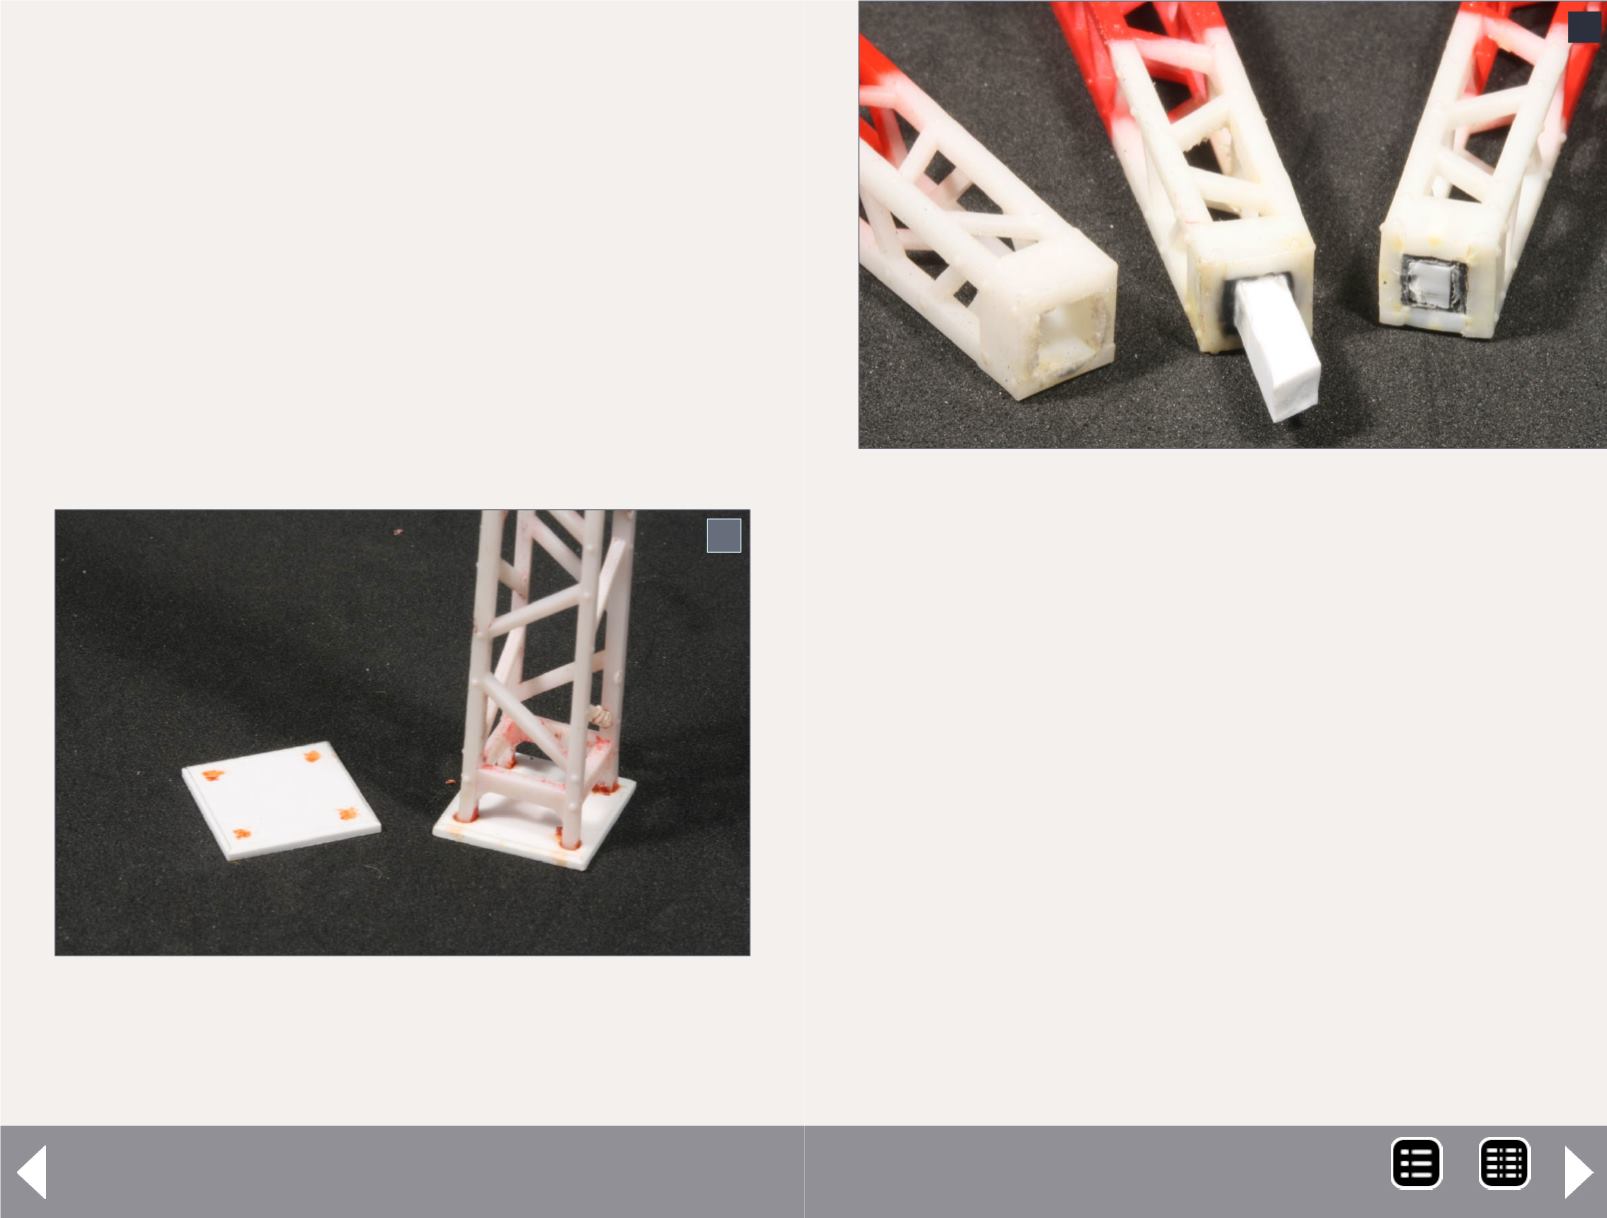
7: Dip the legs into a stamp pad. Carefully place the
tower on the base, allowing the bottom tip of each leg
to transfer the stamp ink to the base, instantly creating
accurate points that can be drilled with a pin vise.
8: A short length of Evergreen #105, .100 x .100” sty-
rene strip into the top of the tower and cut it flush. This
will fill the large hole.
With the base complete, we can move to the opposite end
of the tower. Removing the dish and bulb assembly from
the top of the tower leaves a large hole which must be filled
to support the new whip antenna. If the bulb housing was
removed cleanly, cement a short length of Evergreen #105,
.100 x .100” styrene strip into the top of the tower and cut
it flush. This will fill this large hole. The thick factory-applied
red and white paint can be removed with Scalecoat 2 paint
stripper, leaving a clean surface suitable for airbrushing a
dull steel color
After airbrushing, the rebuilt tower can be further tailored
to its new use by adding several antennas suitable for way-
side base stations. A photograph of the Norfolk Southern
installation reveals a long omni-directional whip style
located at the top of the tower. Replicating this style of
antenna is almost effortless using thin brass rod which can
be easily cut and formed. However, in this instance, looks
may prevail over true prototype dimension.
Scale parts and visibility
In photography, we often encounter a phenomenon known as
perspective distortion, wherein the angle of a photograph will
change the way elements appear in the photo. Similarly, when
we view an object such as a tower-mounted antenna, it may
appear a different size or even a different color depending on
factors such as lighting and the background it is viewed against.
Keeping this in mind, I recommend using materials with
dimensions that look good in your own individual situation,
7
8
MRH-Jan 2014


