Radio base station - 3
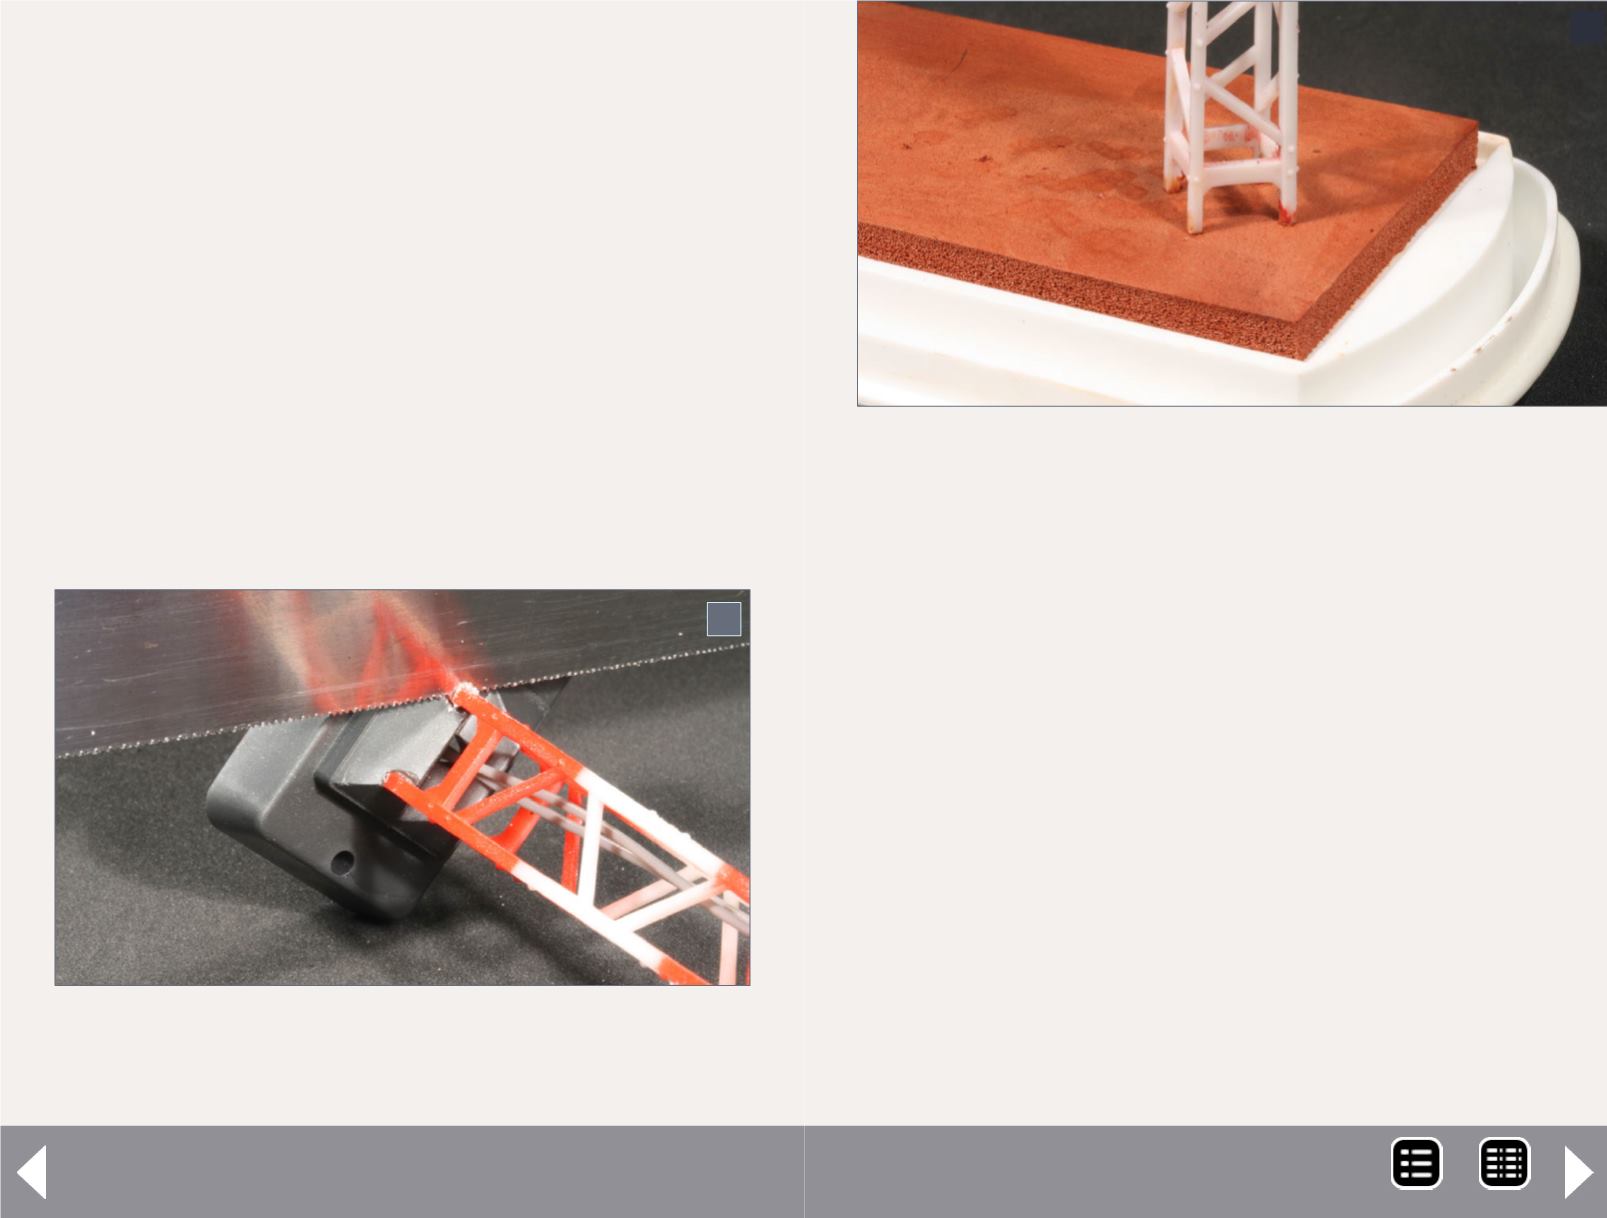
5: The final step in tearing it down is to remove the
crude oversize base from the lattice tower by carefully
cutting through each leg with a razor saw.
6: Level all four legs of the tower with a file. Take your
time so that the tower will stand vertical and not lean
to one side or the other.
tower, removing the wiring from the hole in the base. With the
wiring severed, we can now remove the dish casting and bulb
mount assembly from the top of the tower by gently pulling
it intact from the tower. If it cannot be removed due to glue,
cut or break off the small mounting stem of the bulb housing
and leave it embedded in the top of the tower. The final step in
tearing it down is to remove the crude oversize base from the
lattice tower by carefully cutting through each leg with a razor
saw. Leave as much of each leg intact as possible.
We are now left with a bare lattice tower that can be rebuilt
from the bottom up, starting with a new concrete base. Unlike
the Tyco accessory, the concrete base of a tower is gener-
ally small and low profile, easily replicated by a single square
of Evergreen #4518 sidewalk styrene. Pre-scored into ½” x
½” squares, a single square presents us with a base 43 scale
inches across and .040” thick, deep enough to rise above
its surrounding ground cover, yet shallow enough to easily
blend with its surroundings.
Locating tip
While creating the new base requires little more effort than
snapping scored styrene, mounting the tower on it can
be frustrating and time consuming. Anyone who has ever
installed a detail with multiple mounting stems can attest
how difficult aligning the drill points can be. Mounting the
tower on the base requires drilling four holes, one for each
leg of the tower. Rather than locate the drill points by mea-
suring and marking intersecting lines, an easier way is to
level all four legs of the tower with a file and then dip them
into a stamp pad. Carefully place the tower on the base,
allowing the bottom tip of each leg to transfer the stamp ink
to the base, instantly creating accurate points that can be
drilled with a pin vise.
5
6
MRH-Jan 2014


