Shoofly free-moN module - 19
abutment, workers removing the wood framing of a finished
abutment, and a surveying crew aligning both abutments while
a bulldozer clears the miscast concrete chunks. (27)
I scratched the finished abutment out of styrene, while the
crumbled remains of the miscast abutment are the crumbled
remains of balsa foam with some wire and screen mesh pieces
sticking out. The rebar was shaped from a screen door repair
patch with a few of the horizontal wires teased out from the
top, and the forms created from stained stripwood. A Model
27
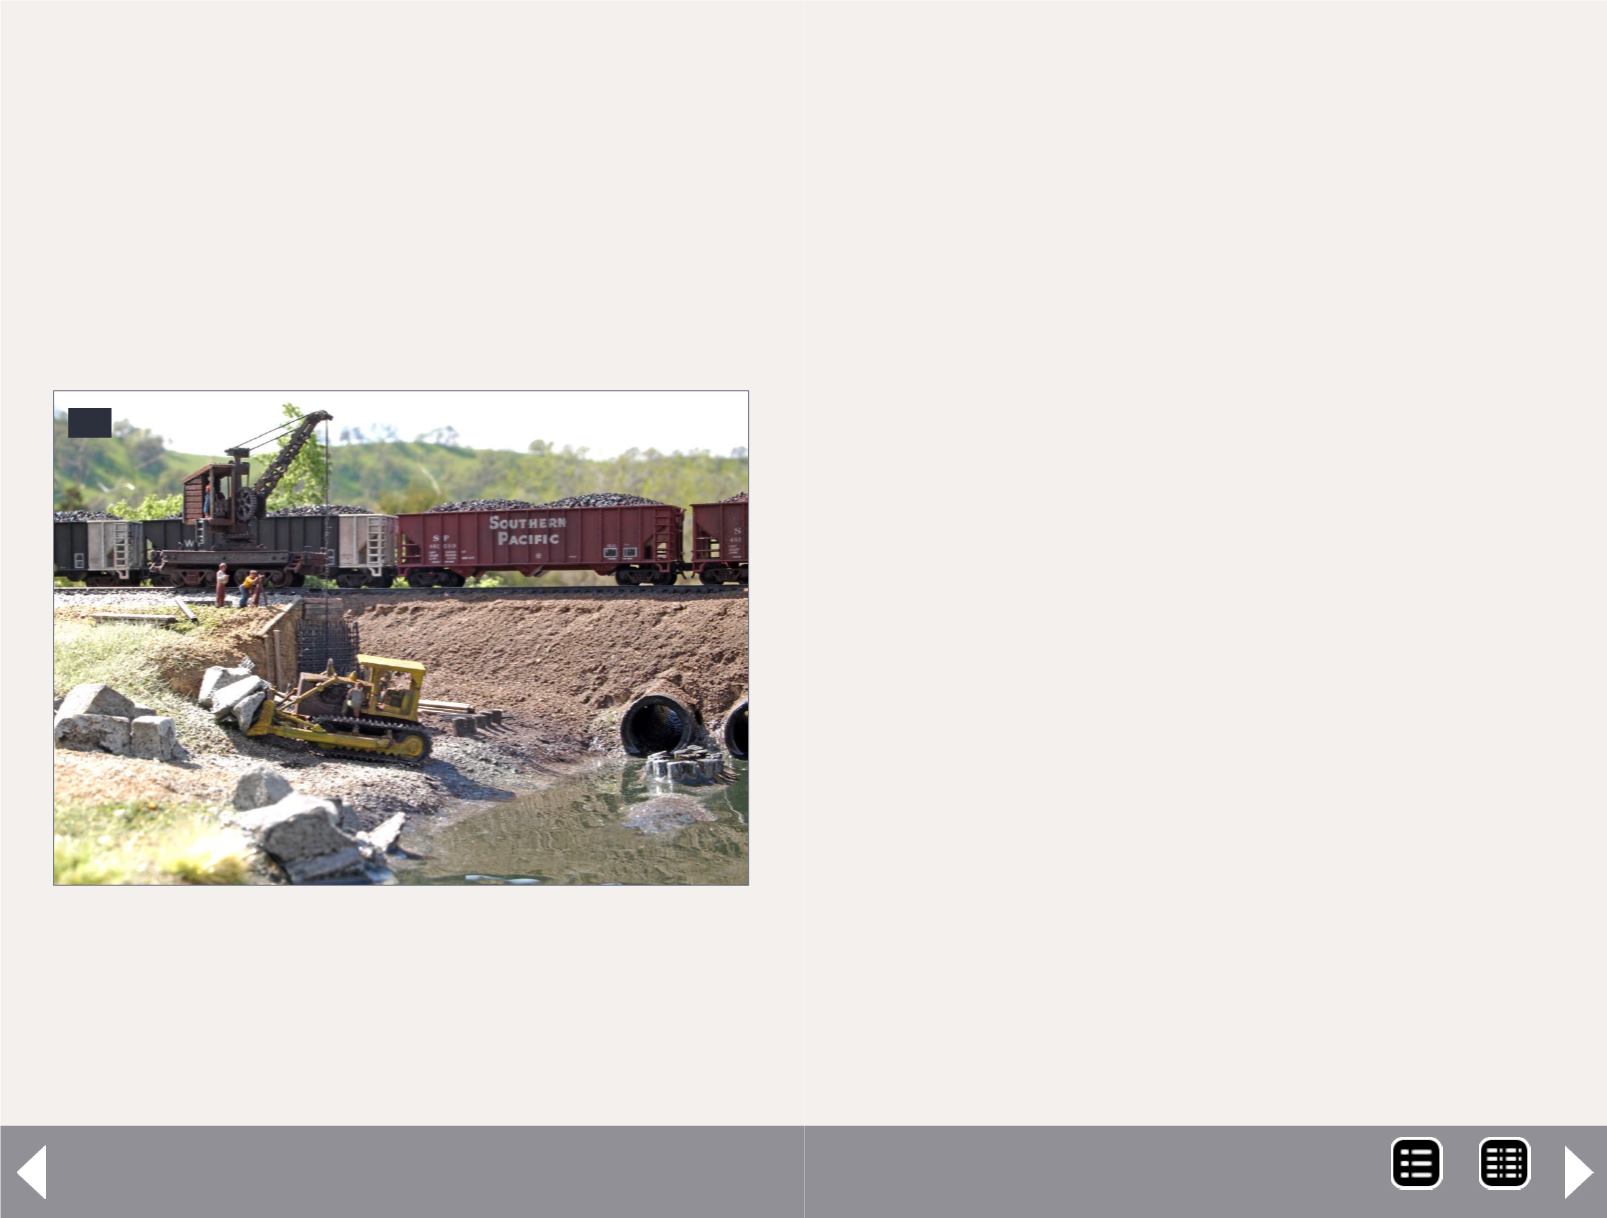
27: Each section of the shoofly scene tells a different
part of the story. The remains of the wooden trestle poke
out of the ground and water. Chunks of miscast concrete
are being carted away, rebar and wooden forms begin to
rise around the hoist crane, and surveyors ensure this
time everything will work out right.
Tech Studios hoist crane and a GHQ bulldozer provide some
mechanical muscle to help get the new bridge built before the
spring rains really start slowing things down.
The scene must be somewhat successful because, even
after explaining what’s going on and why I chose the specific
moments of tableaux, people still ask me, “So … when’s the
bridge going to be finished?”
Water
The Voice of Experience says, “Pour the water last!!” No mat-
ter what material you use for water it immediately becomes
a magnet for dust, dirt, foam, glue, static grass and any other
type of debris floating around during construction.
Or, pour a thin layer early on to mark off the water area and to
seal ground around it and then do another pour at the end of
construction to cover over any blemishes or trapped debris. I
used Magic Water, as it doesn’t smell like epoxy, doesn’t crack,
is easy to tint with solvent-based paints, and you can pour
up to ½” at a go (which is more than enough for deep N scale
water). I tinted the Magic Water with a few drops of Floquil
BNSF Heritage Green and Grimy Black, which results in a
muddy green color similar to many Northern Californian creeks
and rivers.
“No matter what material you use for water it
immediately becomes a magnet for dust, dirt,
foam, glue, static grass and any other type of
debris floating around during construction.”
MRH-Nov 2013


