Build a laser kit part 3 - 4


            STEP 8: Exterior details


            Continued ...


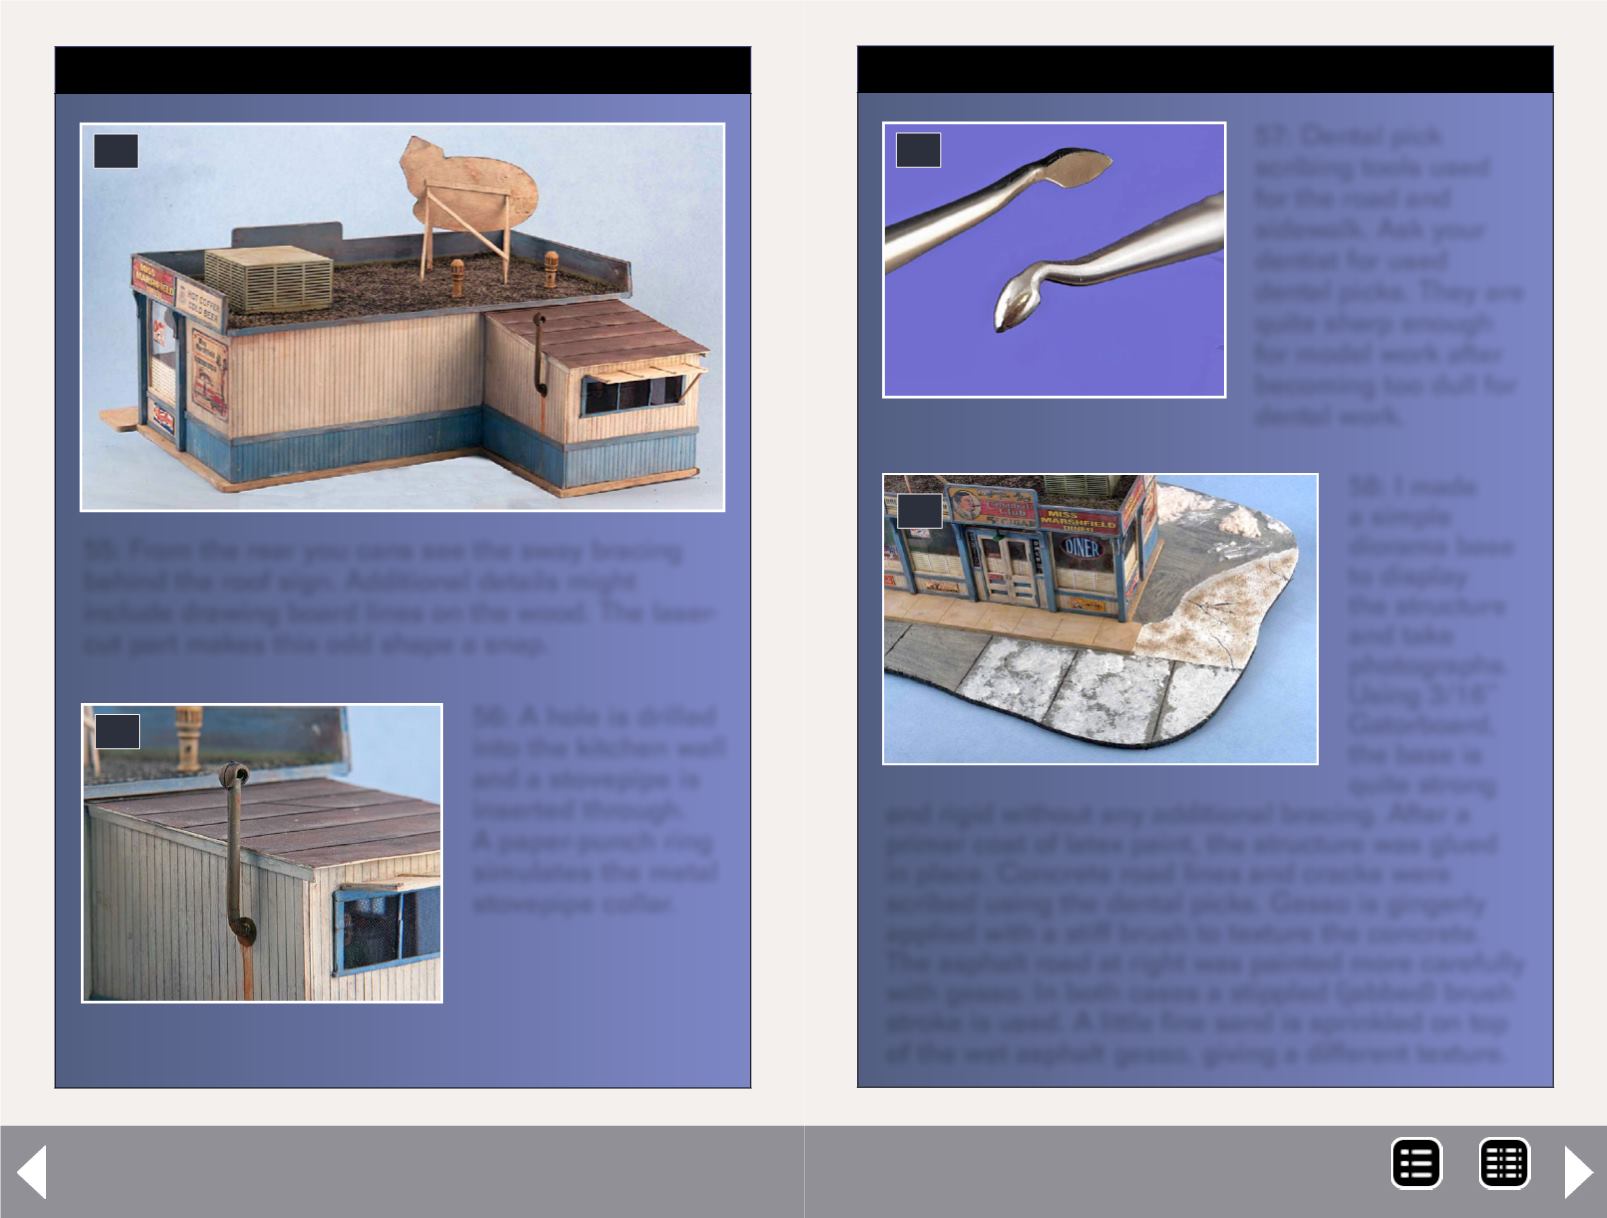
          55: From the rear you cans see the sway bracing
        
        
          behind the roof sign. Additional details might
        
        
          include drawing board lines on the wood. The laser-
        
        
          cut part makes this odd shape a snap.


            55


          56: A hole is drilled
        
        
          into the kitchen wall
        
        
          and a stovepipe is
        
        
          inserted through.
        
        
          A paper-punch ring
        
        
          simulates the metal
        
        
          stovepipe collar.


            56


            STEP 9: Building the diorama


          57: Dental pick
        
        
          scribing tools used
        
        
          for the road and
        
        
          sidewalk. Ask your
        
        
          dentist for used
        
        
          dental picks. They are
        
        
          quite sharp enough
        
        
          for model work after
        
        
          becoming too dull for
        
        
          dental work.


            57


          58: I made
        
        
          a simple
        
        
          diorama base
        
        
          to display
        
        
          the structure
        
        
          and take
        
        
          photographs.
        
        
          Using 3/16”
        
        
          Gatorboard,
        
        
          the base is
        
        
          quite strong
        
        
          and rigid without any additional bracing. After a
        
        
          primer coat of latex paint, the structure was glued
        
        
          in place. Concrete road lines and cracks were
        
        
          scribed using the dental picks. Gesso is gingerly
        
        
          applied with a stiff brush to texture the concrete.
        
        
          The asphalt road at right was painted more carefully
        
        
          with gesso. In both cases a stippled (jabbed) brush
        
        
          stroke is used. A little fine sand is sprinkled on top
        
        
          of the wet asphalt gesso, giving a different texture.


            58


          MRH-Nov 2013