different sizes. Holding the different heralds up to the car using
tweezers, I picked the one that looked the best.
I opened up the car, and it was easy enough to pop the red
lens. The problem was that this left a hole in the car. While
the drumhead will cover the hole, there is almost nothing left
to glue it to. I lined the inside of the hole with a small piece
of Scotch tape and sealed the car up. Next, I took some of the
glue from the interior weights and added it to the hole in the
rear of the car. After I had built up enough, I used some spare
card stock to make sure it covered the entire hole evenly.
I found that the car had to remain with the rear end held
straight up while the glue set. My car cradle and a bunch of
hard-backed books made this possible. After curing for several
hours, the plug was large enough to allow using super glue to
attach the drumhead to the rear of the observation car.
Wheel and coupler fixes
And so, I thought that the cars were done. Well, it was dur-
ing the first attempts at doing video on the “completed” train
that I found out that I was wrong. A couple of things turned
out not to work correctly. One was the couplers. Turns out that
the #5/508 truck-mounted
couplers were about 25%
too low. This caused them to
bind against turnouts in the
track, and also to disconnect
from the engine at the least
amount of interfence.
The second problem
was that the wheelsets I
installed did not turn freely
City of Miami - 5
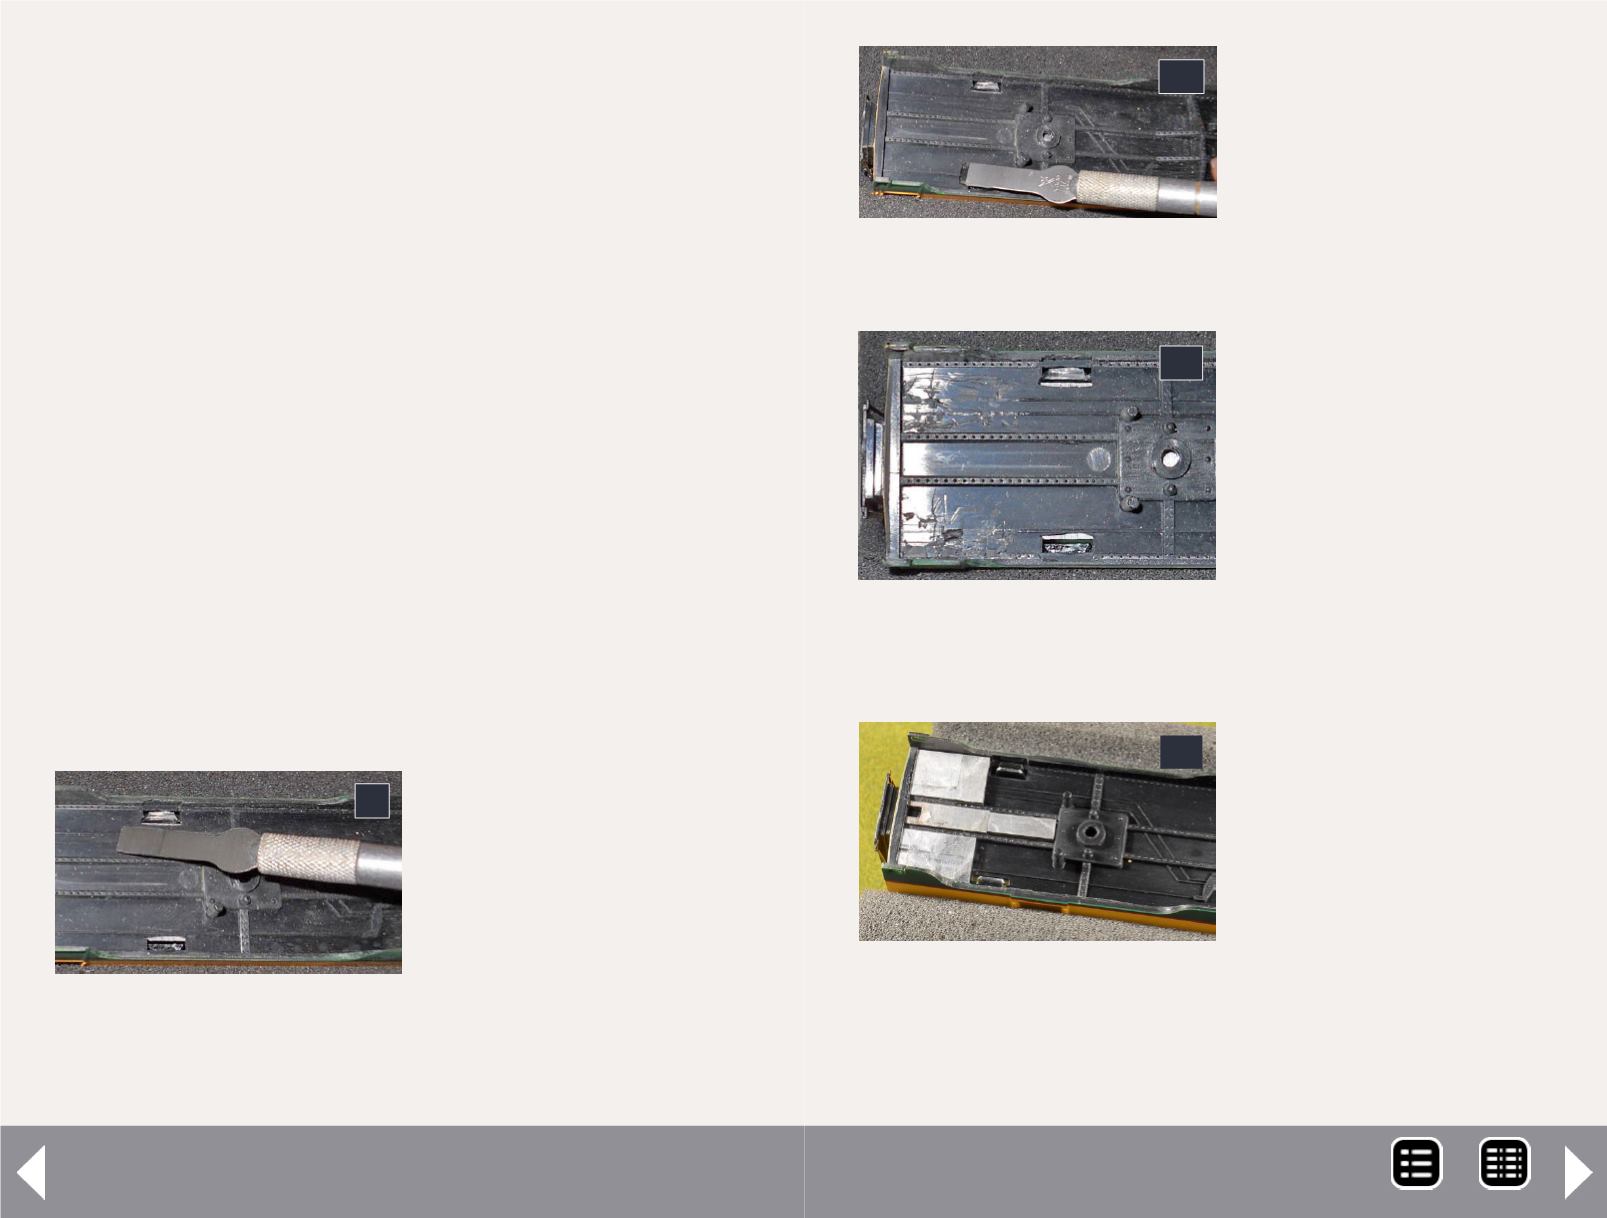
9: I began removing the
air line for the new body
mount coupler kit.
9
10: Next I remove the ridges
along the edge of the body.
10
enough, causing prob-
lems. I decided to try the
Intermountain wheelsets.
The Intermountain wheel-
sets took some doing to
run down, but I did find
them, and that solved my
problem.
Two solutions to the cou-
pler problem were avail-
able. The first would be
to replace the #5 Kadees
in the #508 Talgo Bolsters
with #27 or possibly #147
Kadee couplers. The second
is a body-mount solution
offered by Adair Shops. I
decided to go with the sec-
ond option.
After I had assembled the
Adair Shops kits, the req-
uisite number of #5 Kadee
couplers were recycled from
the #508 bolsters I already
had. I also purchased two
new tools I needed, a 4-40
tap and tap wrench and a
#17 X-Acto blade. I started
with a spare car to get a feel
for how these body mount
couplers work and how to
install them.
11: The body of the car is
now ready for installation of
the coupler kit.
11
12: The first part of the cou-
pler kit is installed onto the
car. Use the cement sup-
plied with the kit.
11
MRH-Jul 2013


