GETTING REAL |
12
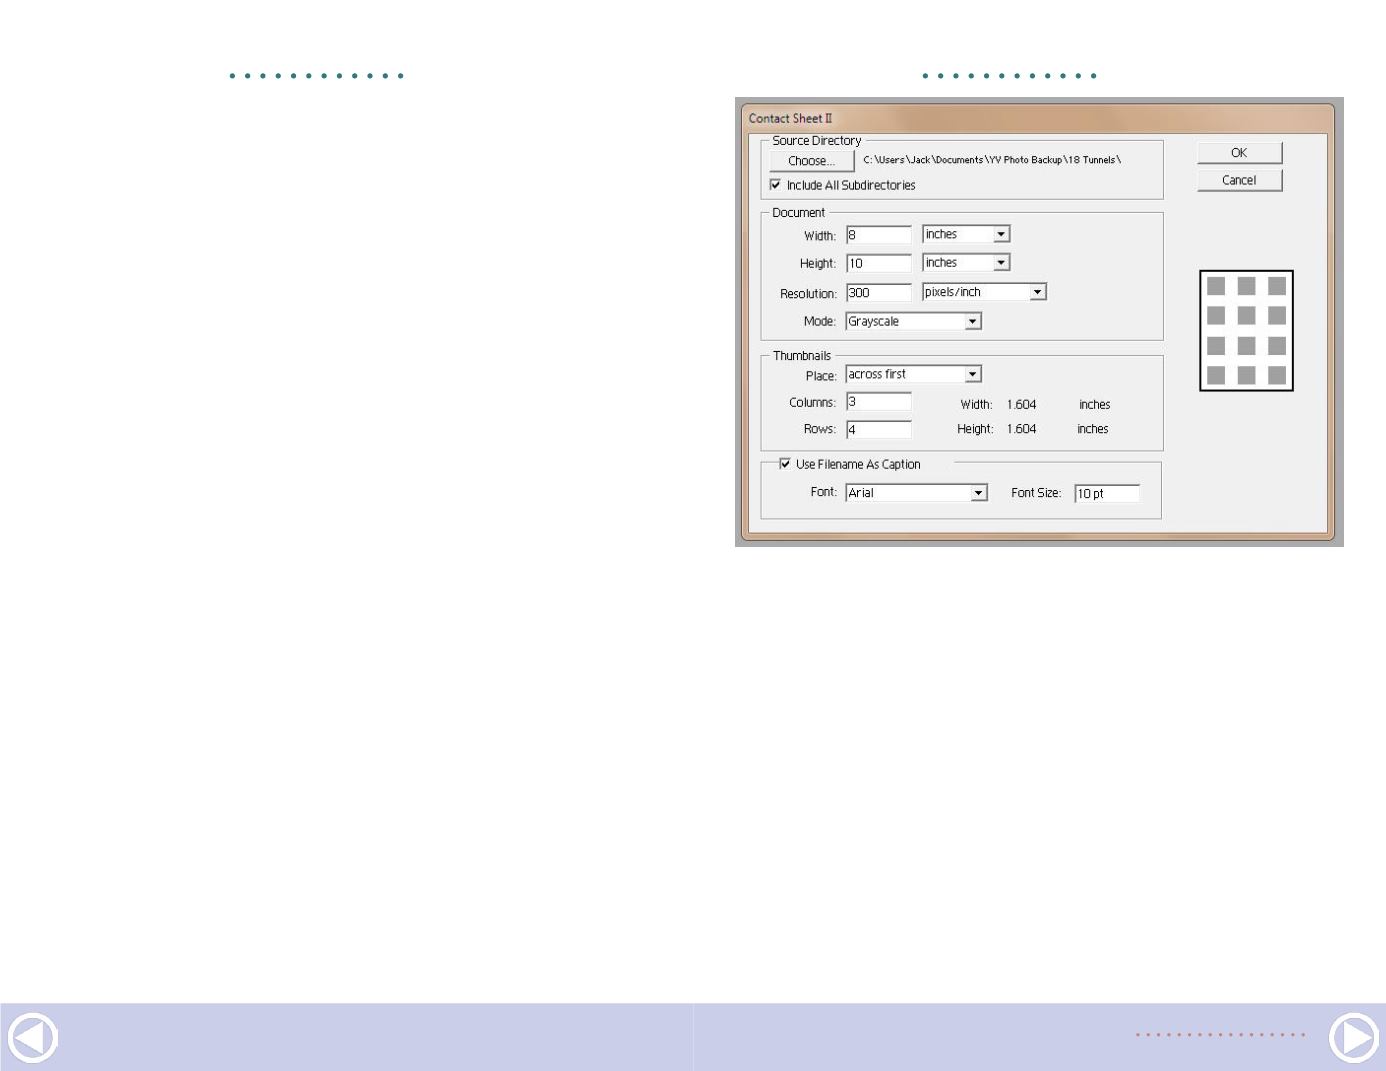
contact sheet and whether file names will be included [5].
Remember to select Grayscale if you are making contact sheets
for B/W images, or the resulting prints will have a slight color
tint to them. When you have the options set, click on Choose
and select the folder to be indexed.
Once the folder has been selected, click on OK. Photoshop
Elements will then build the contact sheets and index all of the
photos in the selected folder [6].
I print the contact sheets and place them in binders with dividers
for each folder name. That makes for an easy way to quickly scan
the contact sheets when looking for a particular photo. All of the
contact sheets for each folder are saved in a separate folder.
Photos for modeling projects
One of the real advantages to scanning a photo collection
is being able to make 8x10 prints of the locomotive, piece of
equipment, or building you want to model. It is also easy to
print enlargements of just a portion of a subject. It is really nice
to be working on a model and have several photos of the proto-
type for constant reference during the build.
Improving the photos themselves
One of the major benefits of scanning a collection of photos is
the ability to actually improve them. To illustrate this advan-
tage, I scanned a 5x7 print I made from an original negative
back in my darkroom days.
The print looks reasonably good, but is somewhat dark (7). Since
I want a 10" wide, 300-dpi digital copy (the standard for digital
GETTING REAL |
13
5. These are the Photoshop Elements settings I use to create
contact sheets for all of the scanned photos in each folder.
images for print media), I scanned the print at 600 dpi (you’ll see
why in a minute) and opened the scan in Photoshop Elements.
If your scan isn’t square, zoom out so that there is a border
around the image (click on the Navigator tab and use the slider
to zoom-out) and then click on Select/All and then Image/
Transform/Free Transform. Move the mouse pointer outside the
photo at one of the corners of the image, which will result in the
pointer turning into a two-headed pointer. That will allow you
to rotate the image until it looks correct. Once you are satisfied,
click on the checkmark or press Enter.


