STEP 8: Exterior details
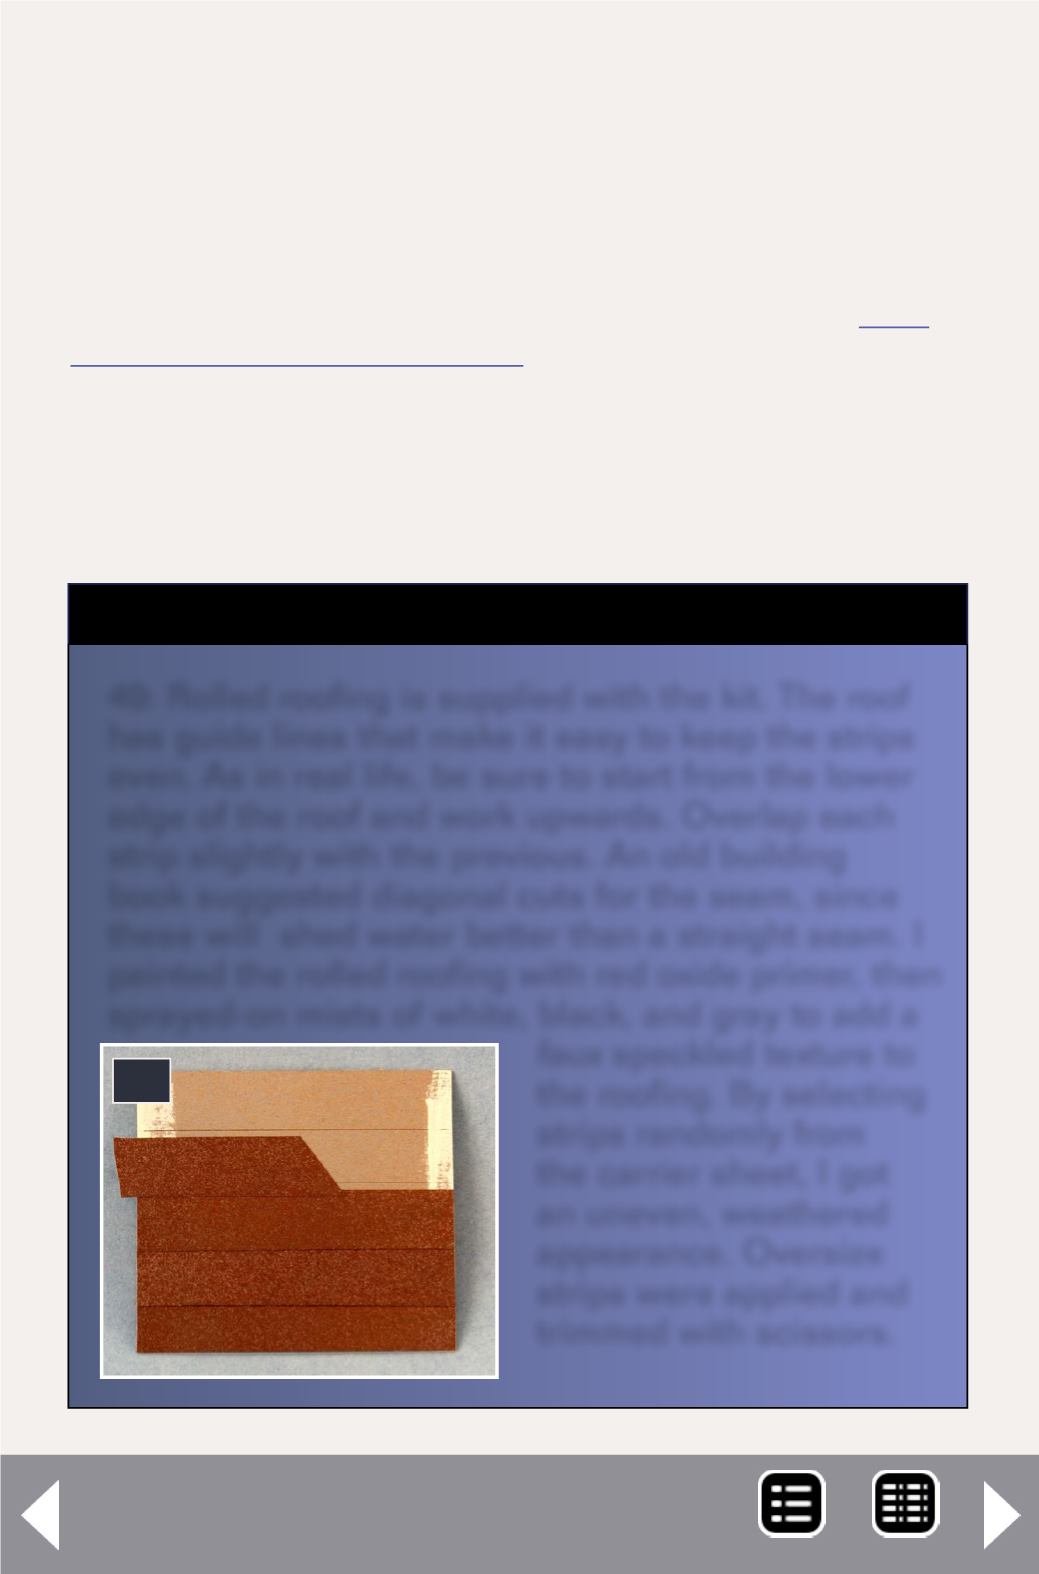
49: Rolled roofing is supplied with the kit. The roof
has guide lines that make it easy to keep the strips
even. As in real life, be sure to start from the lower
edge of the roof and work upwards. Overlap each
strip slightly with the previous. An old building
book suggested diagonal cuts for the seam, since
these will shed water better than a straight seam. I
painted the rolled roofing with red oxide primer, then
sprayed-on mists of white, black, and gray to add a
faux
speckled texture to
the roofing. By selecting
strips randomly from
the carrier sheet, I got
an uneven, weathered
appearance. Oversize
strips were applied and
trimmed with scissors.
W
ith all of the interior detailing completed, it is time
to begin detailing the exterior. Obviously, more
attention is paid to the exterior detail since it can
be clearly viewed, unlike the interior. I will briefly cover how
I built the roof, but if you want more information, go to
There I go over the roofing in
greater detail.
Since I do not have a home for the diner, I built a small di-
orama to display the kit. I also will share some of the scenery
techniques I used.
Building Miss Marshfield Diner ...
49
Build a laser kit part 3 - 2
MRH-Feb 2013


