STEP 4: Building the walls
Continued ...
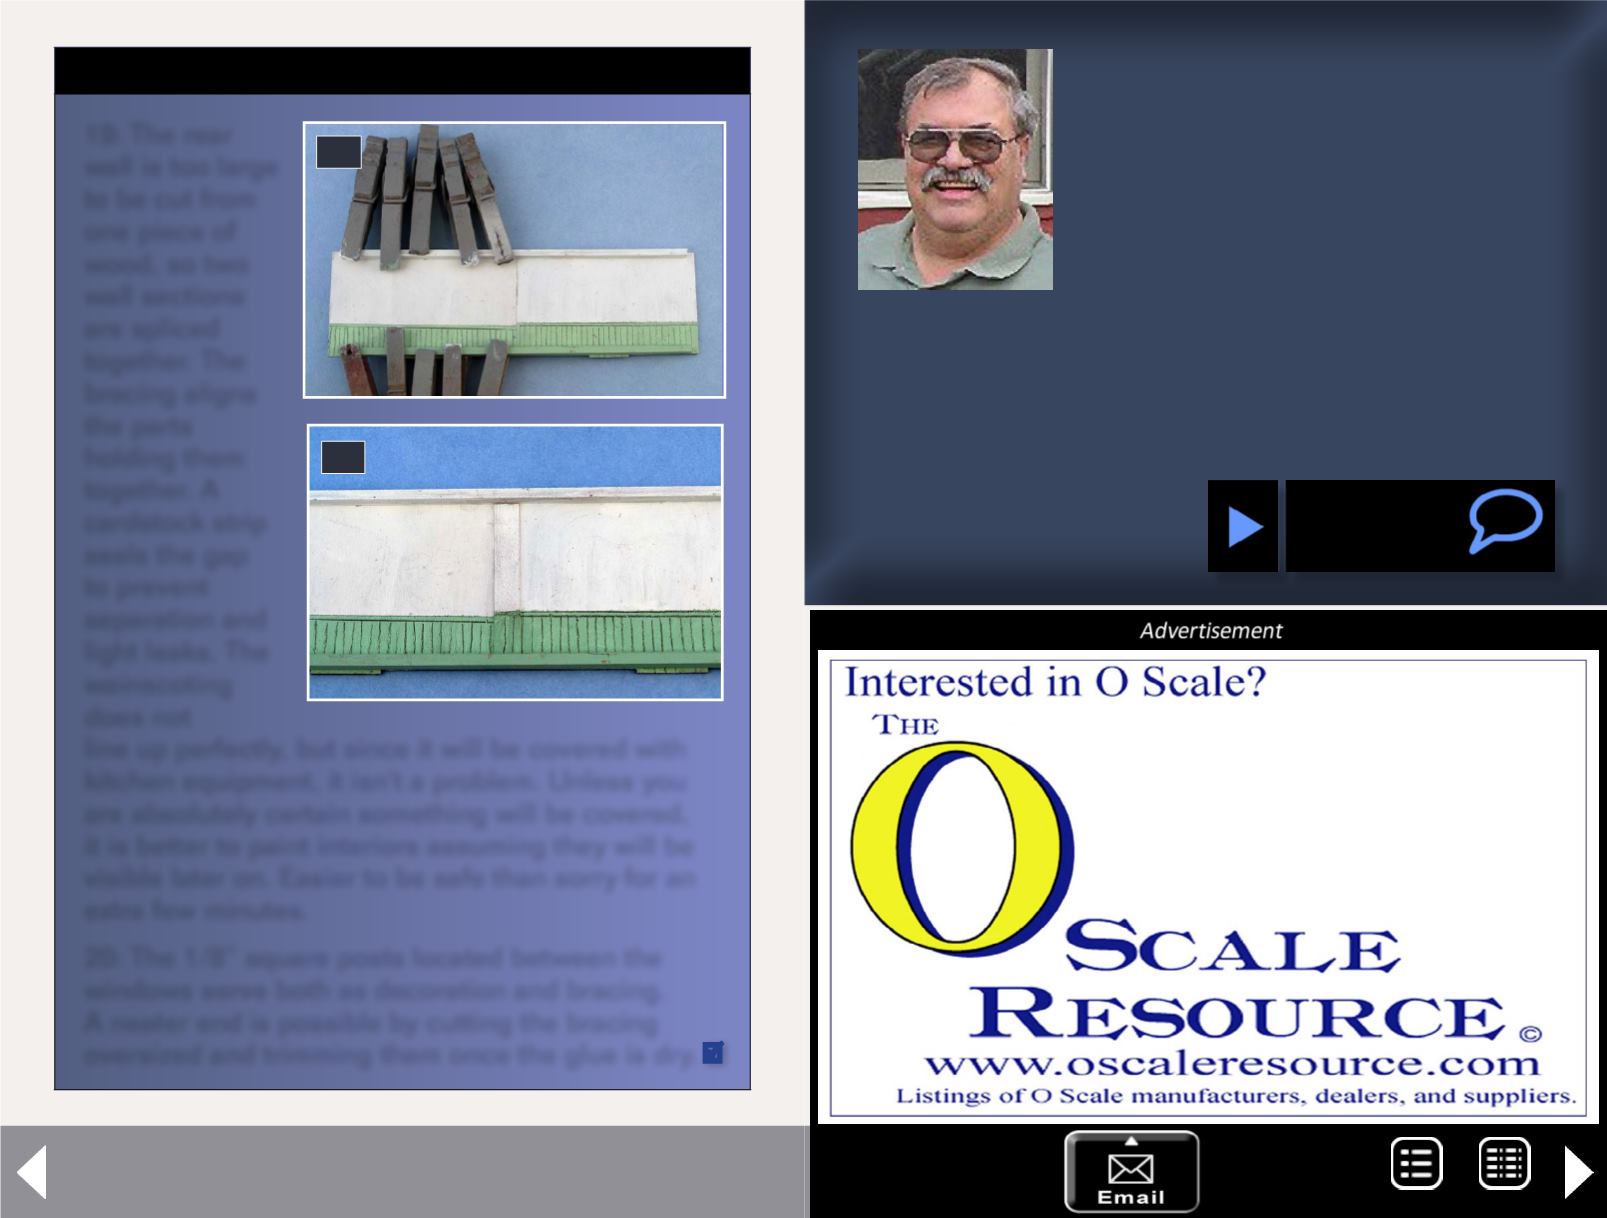
19: The rear
wall is too large
to be cut from
one piece of
wood, so two
wall sections
are spliced
together. The
bracing aligns
the parts
holding them
together. A
cardstock strip
seals the gap
to prevent
separation and
light leaks. The
wainscoting
does not
line up perfectly, but since it will be covered with
kitchen equipment, it isn't a problem. Unless you
are absolutely certain something will be covered,
it is better to paint interiors assuming they will be
visible later on. Easier to be safe than sorry for an
extra few minutes.
20: The 1/8” square posts located between the
windows serve both as decoration and bracing.
A neater end is possible by cutting the bracing
oversized and trimming them once the glue is dry.
19
20
Build a laser kit prt 1 - 8
Michael Tylick has built a number of
smaller layouts of various types and scales
over the years. Mike has been a long time
contributor to Model Railroader, Railroad
Model Craftsman, the National Model
Railroad Association Bulletin, and other
hobby publications. He has also delivered
numerous clinics and presentations on
various railroad and historical subjects.
He now works as a custom builder of railroad structures and
rolling stock, and has recently formed Rail Design Services, for
design and graphic aspects of model railroading.
MRH-Sep 2013


